Packaging and Merchandising Design: Designing Custom Boxes for Non-Boxed Items
28.09.2023 - 05.10.2023 | Week 5 - Week 6
Zoë Lena-maria Nelson | 0364991 | Rotterdam University Of Applied Science
Packaging and Merchandising Design | Task 1: Designing Custom Boxes for Non-Boxed Items
INTRODUCTION
This task aims to improve your ability to create unique packaging solutions for products not typically packaged in boxes. Upon completing this assignment, you should be able to showcase your skills in designing attractive, practical, and innovative boxes that elevate the packaging and display of non-traditionally packaged items.
Requirements
Choose two non-boxed items from your daily surroundings. The size of the item is between 15cm to 20cm. These items should not come in traditional box packaging but should be relatively small in size (e.g., a mug, a book, a pair of sunglasses, a candle, etc.).
1. NON-BOXED ITEMS
Looking at some products, I went for these two got approved by the lecturer:
Figure 1.1.
Shea Moisture
Shea Moisture's commitment to handcrafted excellence deserves packaging that mirrors its artisanal ethos. Custom box packaging, with a thoughtful design and a built-in cap, extends the brand's narrative. This bespoke packaging safeguards the integrity of Shea Moisture's products and amplifies the story of meticulous craftsmanship. The incorporated cap exemplifies functionality, offering a seamless user experience while emphasizing the brand's dedication to convenience. Through this packaging innovation, Shea Moisture presents a visually compelling product. It showcases its commitment to quality, storytelling, and user-centric design, creating a memorable and harmonious connection with its customers.
Figure 1.2.
Rainbow SprinkelsCustom box packaging for Dr. Oetker Rainbow Sprinkles features a unique design with a small shutter on the side, elevating the product's presentation and functionality. The vibrant rainbow colours of the sprinkles can be viewed through a clear window in the shutter, making it visually appealing and enticing for customers. Additionally, the shutter allows for easy monitoring of the remaining quantity of sprinkles. The innovative design adds a touch of interactivity to the packaging, making it memorable and user-friendly. Moreover, the custom box ensures secure storage and freshness of the product. Overall, this tailored packaging solution combines aesthetics with practicality, offering customers a delightful and convenient experience.
BOX DESIGN
2. Shea Moisture:
For the product, I decided to do Corrugated Boxes because it needs to be re-closed again. It needs to re-close again because the value of the product is liquid. Therefore it must reclose.
I first tried to make a sketch on Illustrator, but then I found out you have a website for it.
Figure 2.1.
Figure 2.2.
I changed the box design because I realised that having a hole in the bottom wouldn't work if I put liquid product in it. So I made some adjustments, and now it's good to go.
Figure 2.3.
After getting more inspiration for a closed back and a closing top, I developed the twist box design. I chose this design because it keeps the package lit, and it's easier to use this product that's supposed to be in the box. Measurements are 90mm and 70mm, as seen in the figure.
3. Rainbow Sprinkles
For creating the design for the Dr. Oetker rainbow sprinkles, I also signed a reverse tuck end that's a bit higher and contains enough space for the sprinkles. And on one side of the top, I want to make a small hole you can open and close again where the sprinkles can enter. I also edited another element that is a little full in the door. Therefore, the door to the sprinkles will open if you pull the little door down with your finger, and it will lock so it doesn't fall any further open so the display goes to fall on the other side, and then you put the door back up if you're done with eating. The measurements for this design are: Width 45mm, Depth 45mm and Height 110mm.
Figure 3.1.
Figure 3.2.
4. PROCESS
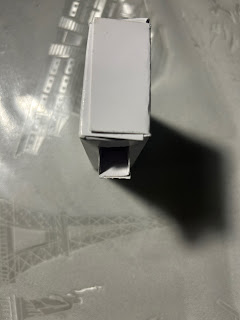
Once the frames and layouts were set, I transitioned to the hands-on phase. Armed with cardboard paper, I meticulously cut and assembled each piece, shaping the boxes into the envisioned forms. The process involved carefully folding, securing, and refining details to ensure aesthetics and functionality. This hands-on journey bridged the gap between digital design and tangible reality, transforming imagination into a palpable creation.
Shea Moisture
Figure 4.2.
Rainbow Sprinkles
Figure 4.3.
Figure 4.4.
Figure 4.5.
The final result emerged after each piece's cutting, folding, and meticulous assembly. The culmination of these steps brought the envisioned boxes to life, bridging the gap between digital design and tangible reality. This hands-on journey transformed my imagination into a palpable creation, showcasing the beauty of crafting with cardboard.
5. PROTOTYPE
Upon reflection, I noticed that I cut corners too tight for the Shea Moister product. For future iterations, I've learned the importance of using a laser guard to achieve a more defined design that seamlessly folds into each other.
Similarly, I observed that the ends needed to be sharply cut with the Rainbow Sprinkles packaging. Moving forward, I plan to utilise laser cutting for precision in the final project and improve my measuring accuracy. Despite this, I take pride in the design for dispensing the sprinkles turned out well—it's functional and doesn't fall apart. Also, it would be more interesting if I had added a clear window so people could see how much is still in the box.
Here are the final results:
Shea Moisture
Rainbow Sprinkles


Reacties
Een reactie posten